I recently got a Pinterest account. I am slightly addicted to it, and have to force myself away once I get started. I came across an adorable tutorial on making necklaces out of recycled T-shirts. I'm a simple girl. I don't like large jewelry, I don't like a lot of "Bling", patterns or expensive stuff. The necklace was a little too large for my taste, but I thought that it would make a a perfect bracelet! For some reason, I like a little bit of chunk on my wrists.

navigation

Sunday, August 7, 2011
30 Day Craft Challenge...Day 5
Before I jump into Day 5, I want to point something out. It is officially August 7th, but I'm only on Day 5. Confusing, eh? I promise you that I have indeed done a craft a day, I'm just not quick enough about getting them posted on here. Some of my crafts are done late at night, after the Monsters go to bed. I love this blog, but not enough to stay up late to actually make a post. I would love to say that I'm going to catch up, and make the post on the day they happen, but that would more then likely be a lie, so I won't do it. Just have faith that the crafts are happening when they should be. Ok? Thanks!
Saturday, August 6, 2011
30 Day Craft Challenge...Day 4
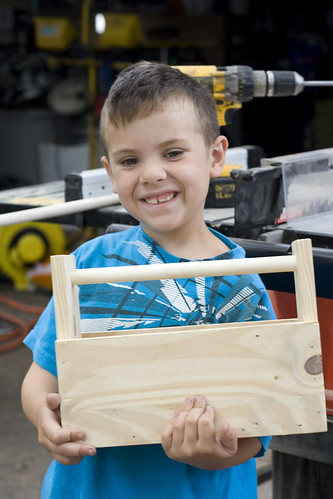
I want to tell you all about my Dawson, our middle child. He's a boy of pure imagination. The things that boy comes up with is mind boggling. So many of the things we do, are because of him. He thinks them up, asks repeatedly when we can do them, and finally we do. Recently I bought him a drawing tablet, to draw his ideas on paper. He drew a tool box. Him and Daddy-O made the tool box, following his blue prints.
Friday, August 5, 2011
30 day Craft Challenge...Day 3
This year has brought some crazy weather. It snowed all spring long, we've had bad storms, and a ton of rain. Along with storms comes fallen branches, lots of fallen branches. Here and there we pay the boys to run around the yard and collect the branches and sticks that have piled up. Typically we put them in a wagon and drag them into the back, but last time, we were lazy. They were piled up on the sidewalk, and there they have sat.
Thursday, August 4, 2011
A Blast From My Past
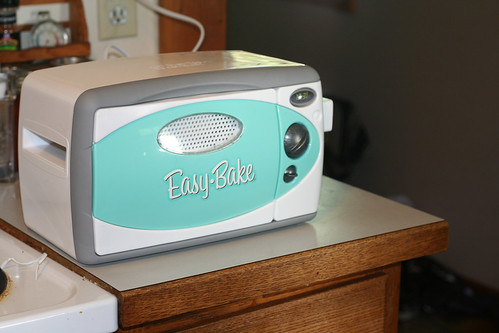
The other day we were at Walmart, making our usual "necessities" trip. Like we normally do, we took our little stroll through the toys...just in case. I happened to look down and spy something from my past. On Clearance!! That item was...drum roll please.... An Easy Bake Oven! I know they've been around, and it's not a new thing, but I haven't touched one of those things since I was at least 10 yrs old. I convinced the boys they needed it. They wanted it. Imagine the smiles on their faces when I told them they could bake cakes and cookies, whenever their little hearts (tummies) desired!
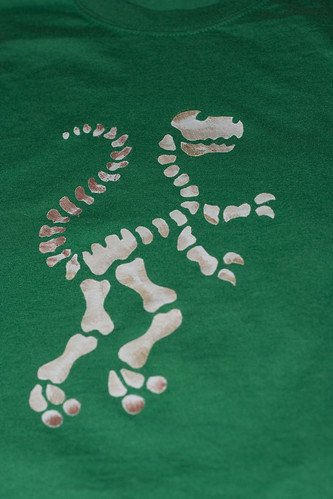
30 Day Craft Challenge...Day 2
Day 2 is the continuation of the freezer paper stencils! It's time to paint. Last blog ended on the stencils being ironed on. You will now need some sort of cardboard to stick in between the shirt, fabric paint, and some paint brushes. For the fabric paint, I use Tulip Brand, Soft Fabric paint. Which you can find at most or any craft store.
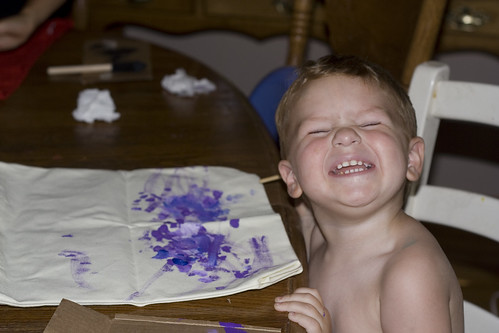
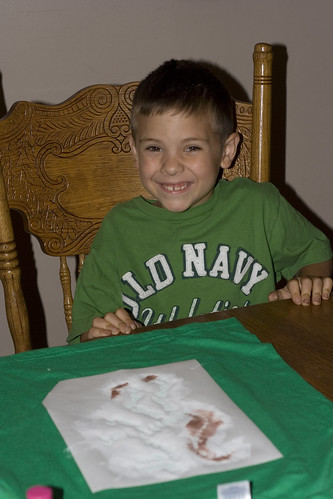
I had the older boys paint their shirts, I painted the youngest ones shirt, and I let the little one paint an extra little tote bag I had, just so he wouldn't feel left out. I gave them each one of those foam brushes and let them go to town! The best technique to paint is to dab the paint, not brush it on. It takes a little bit longer, but it turns out so much better then brushing it on, and it lasts longer. I recommend 2 light coats of paint, but obviously use your judgement. Some colors will use more coats, some will use less.
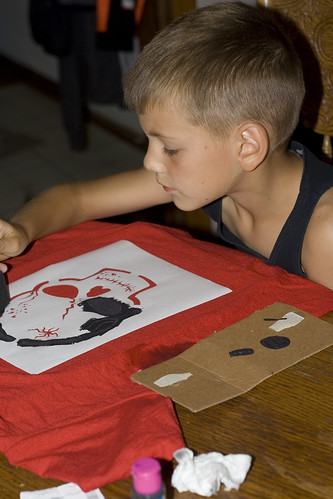
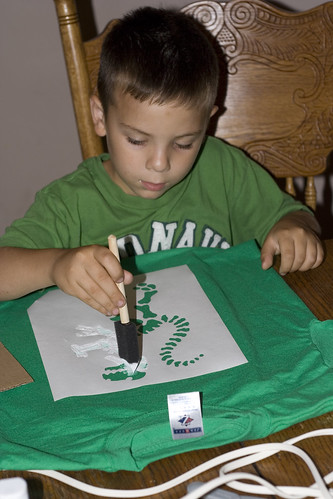
Once you have finished painting, let it dry for a few minutes, but make sure you peel the stencil off before the paint dries all the way. If you have any little pieces, like in the letters, use your exacto knife to help peel those off. Go slow removing the stencil, you don't want to mess up the paint job!
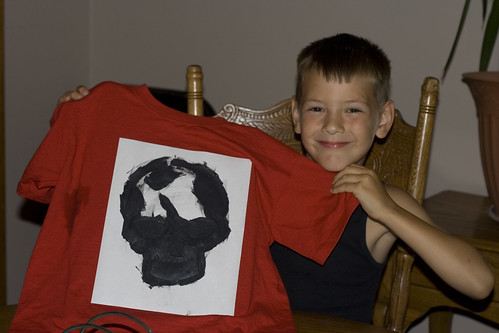

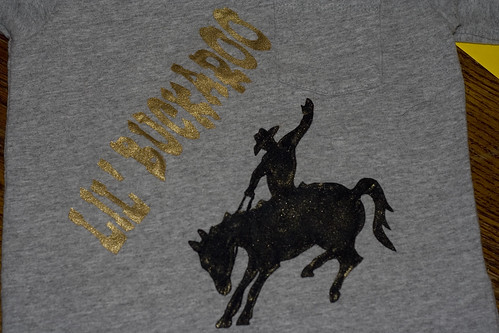
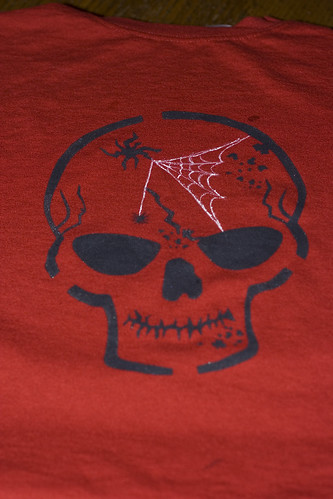
There you have it! Your shirts are done! We did do a little extra on a couple of our shirts after the paper was peeled. The skull got spider webs, and the cowboy got a light brushing of gold. Let them dry for a while, I usually *try* to wait 24 hrs.
Monday, August 1, 2011
30 Day Craft Challenge....Day 1
Woo hoo! Day one! I actually started this challenge! For day numero uno, I decided to go with a craft I was obsessed with a couple of years ago. Freezer Paper Stencils! Back in the day, when our youngest was first born, I painted so many little onesies with this method. It's easy, fun and oh so adorable! This is also kind of a 2 step process...at least for the blog. Tonight, I will give you the tutorial on cutting the stencil out.
Subscribe to:
Posts (Atom)